Post by Casey on Nov 25, 2013 18:40:56 GMT -8
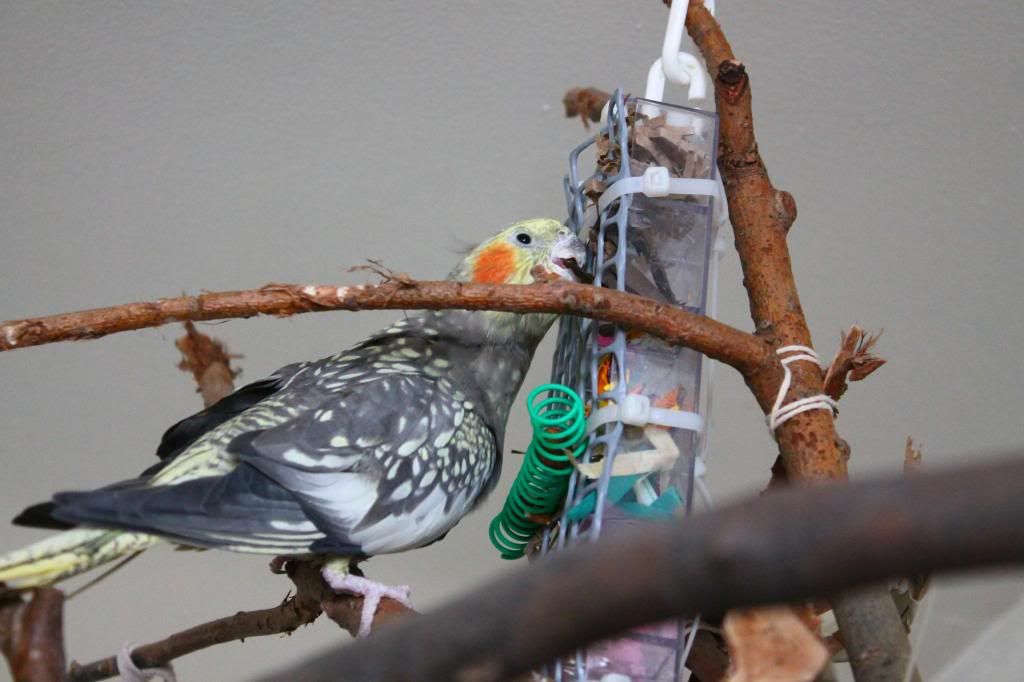
So my fids LOVE these. I am making one for my friend's cockatiel (my god-fid) for Christmas. I figured I'd take photos and give instructions to others on how to make this relatively simple toy. It's also relatively easy on the wallet--your biggest expense will be the plastic mesh! I'll explain why... The mesh can be hard to locate in some hardware stores, and you have to buy a ginormeous roll of it at a time. It's not sold by the foot unfortunately. It's 1/2" spaced 100% plastic mesh (thick). You might be able to locate it in the garden section, or with the wire mesh section at some hardware stores. We got ours at Home Hardware. We bought the bead container from our local dollarstore.
What you will need:
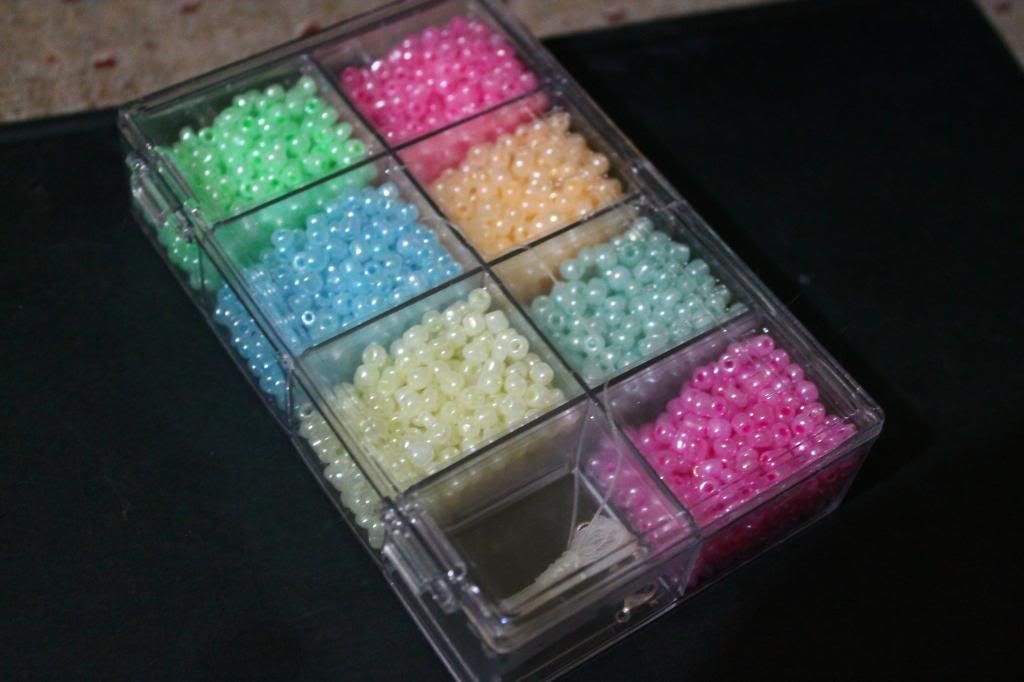
1 Bead container, see photos.
1/2" spaced plastic mesh
Birdsafe rope/twine OR zipties (make sure you file down any cut edges!)
1 Bird safe clip
Scissors
Dry treats your bird(s) likes (millet and nuts are ideal)
Paper, cardboard, and other "fillers"
Step one:
Take your bead container and empty out the beads (if they are size/material appropriate for your birds, keep them for other bird toys!).
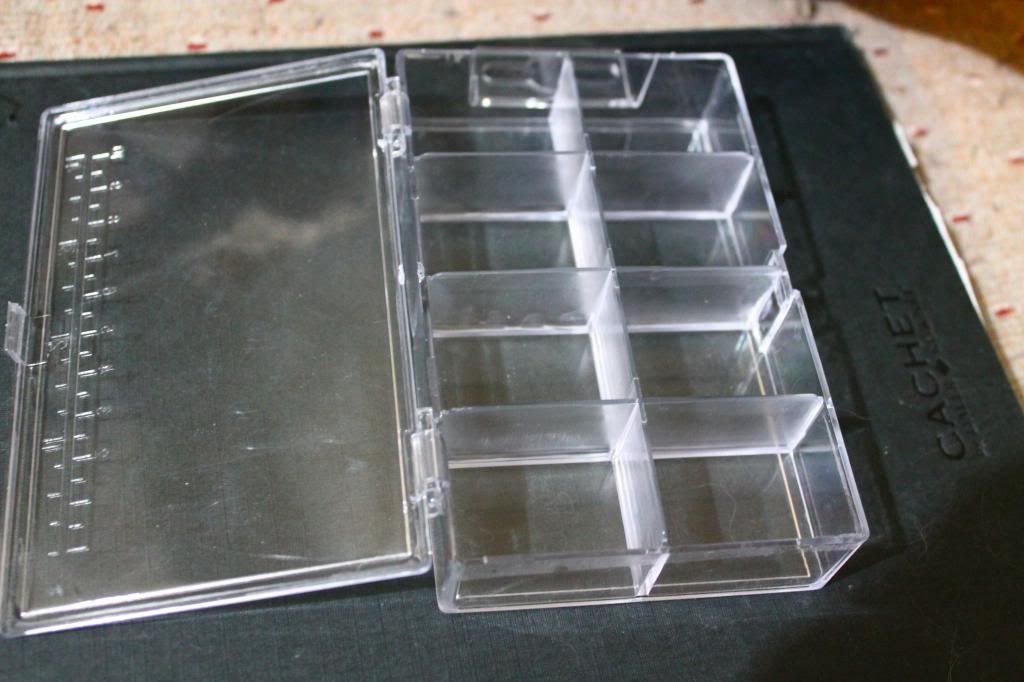
Step two:
Remove the hinged lid from the container. Discard the lid!
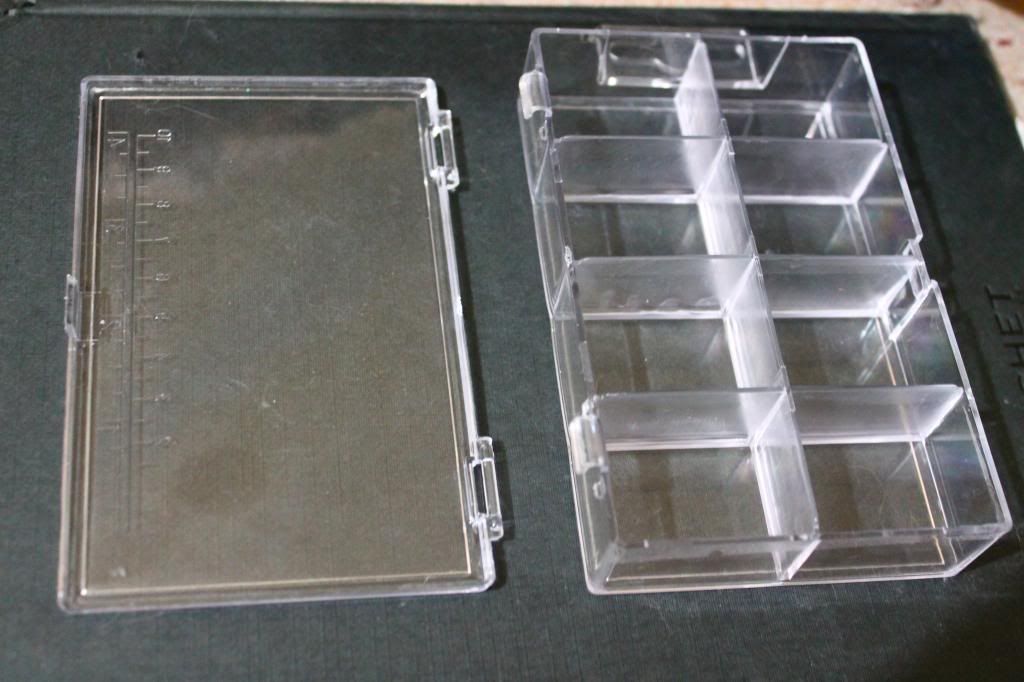
Step three:
Get your supplies ready.
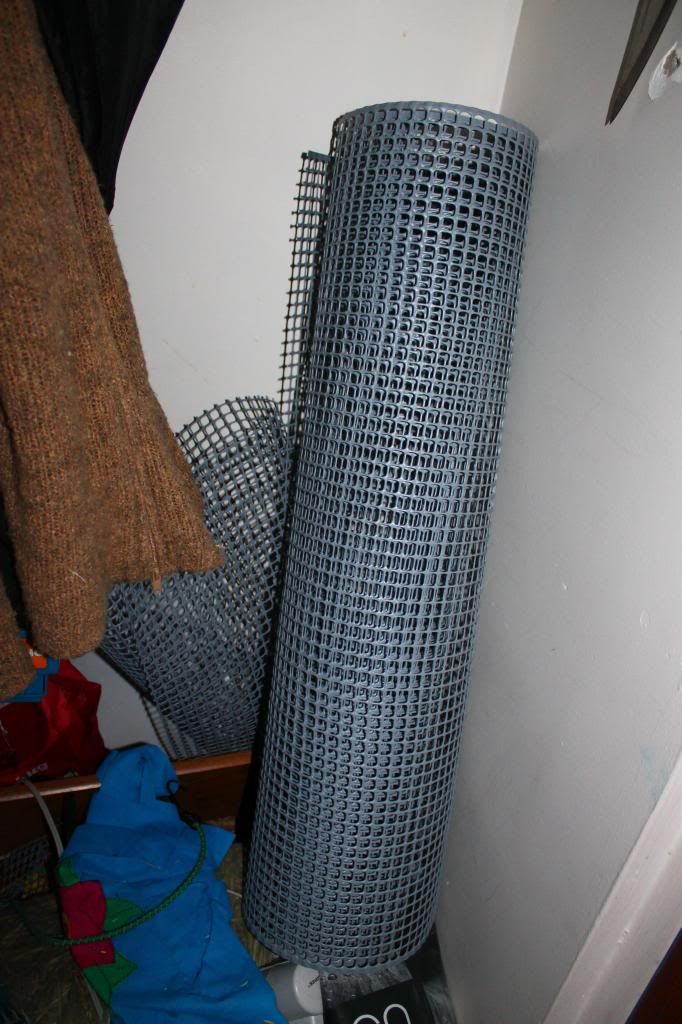
This is the roll of the mesh in our closet for storage, you can see how much we have of it. It's very handy for a LOT of bird-related DIY projects, so buying a whole roll isn't so bad--there's always a use!
Step four:
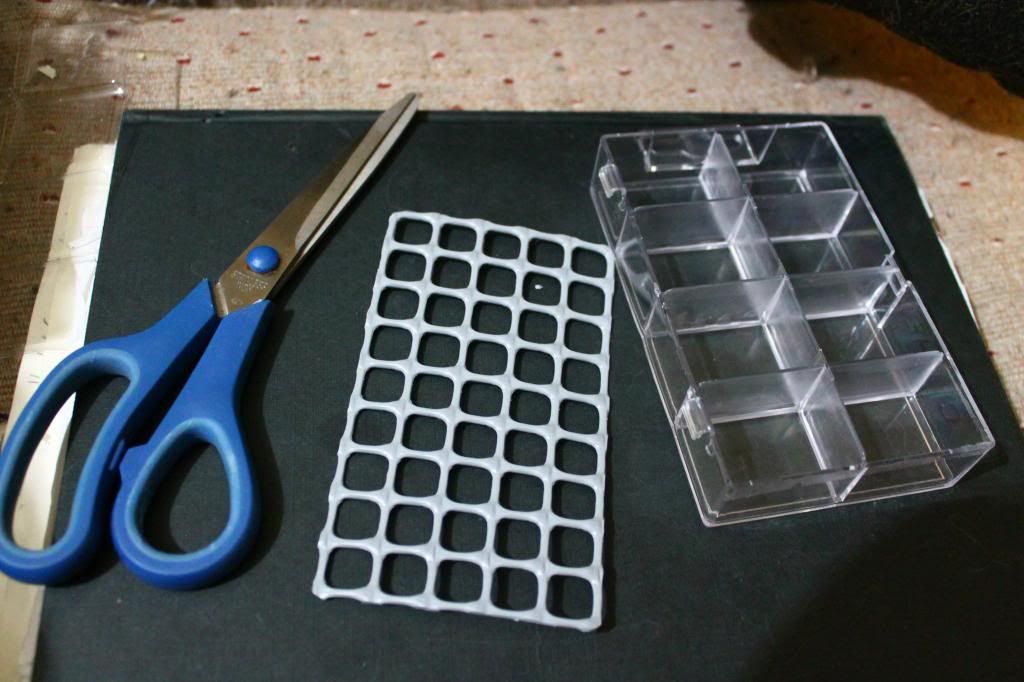
Cut a section of the mesh to size for the bead container. Make sure you do not have any sharp corners or sharp edges. You should cut close enough to make a clean rectangle with smooth edges.
Step five:
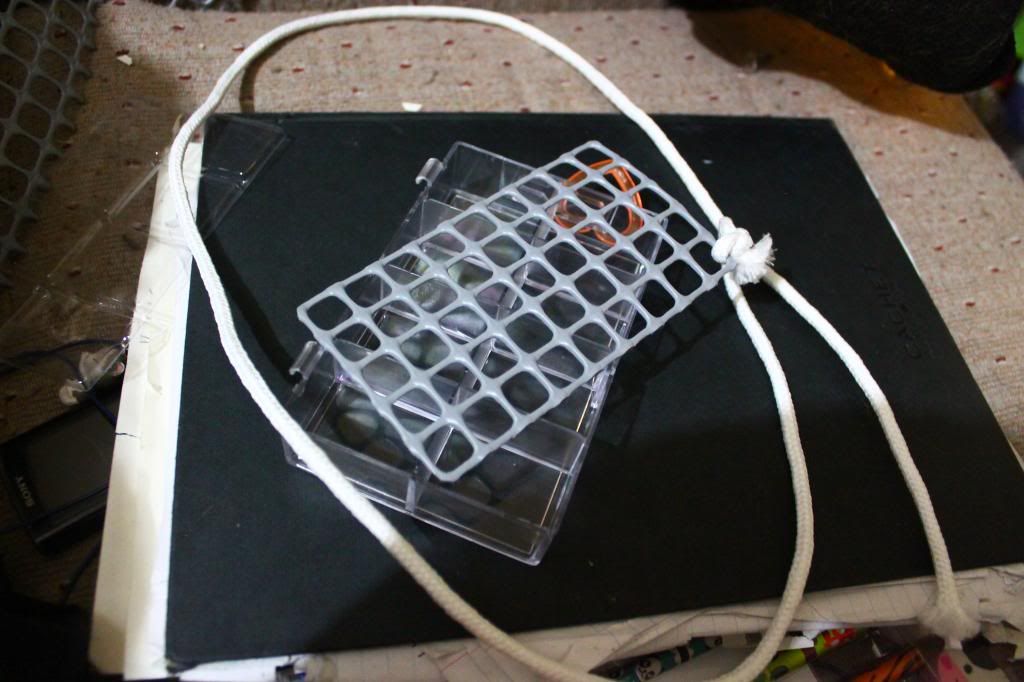
Take your rope and tie it to one of the corners of the mesh. Make sure it is secure.
Step six:
Allign the mesh onto the front of the container and take the tied rope and secure it to the other side of the toy. Keep the front of the toy free of the rope and secure the rope tightly. You should make sure you secure the corners of the mesh to the toy as tightly as you can. Upon the last corner, tie off the rope and cut off the excess.
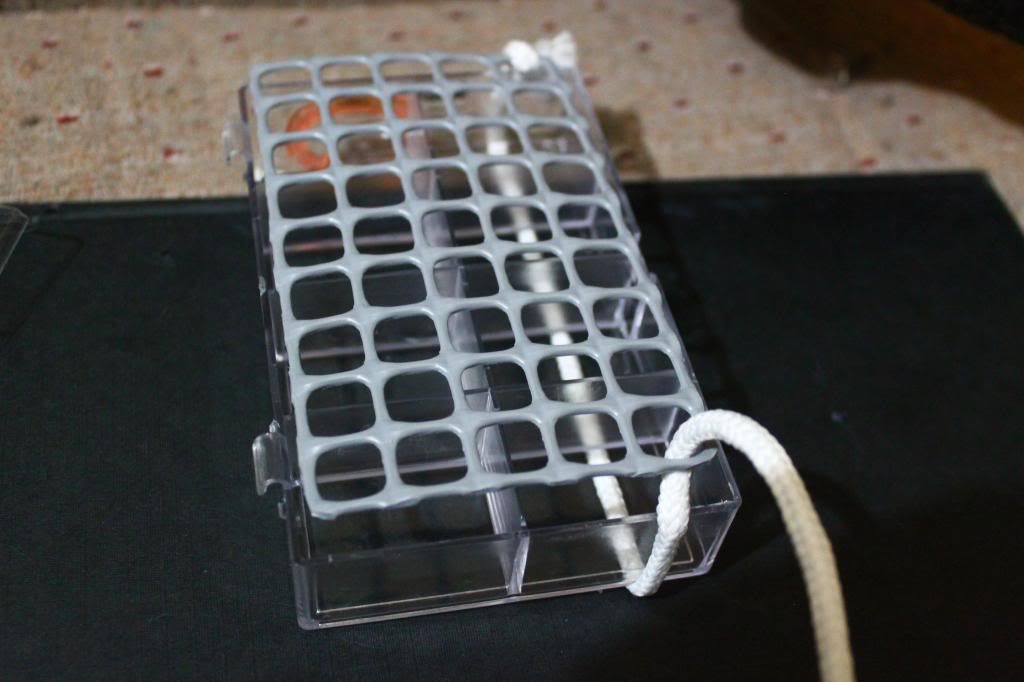
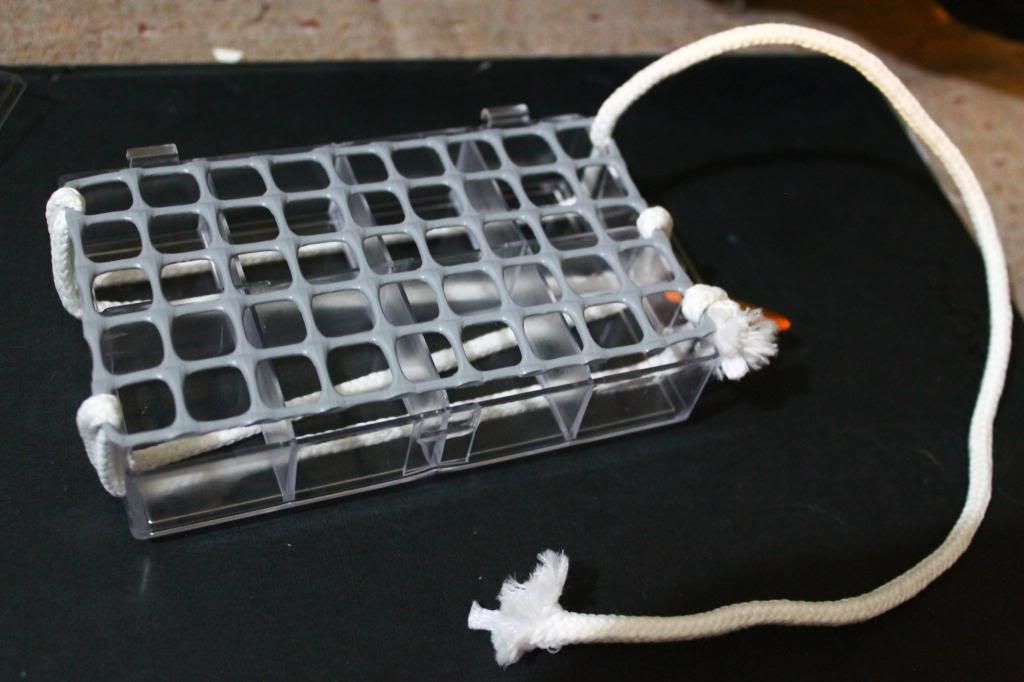

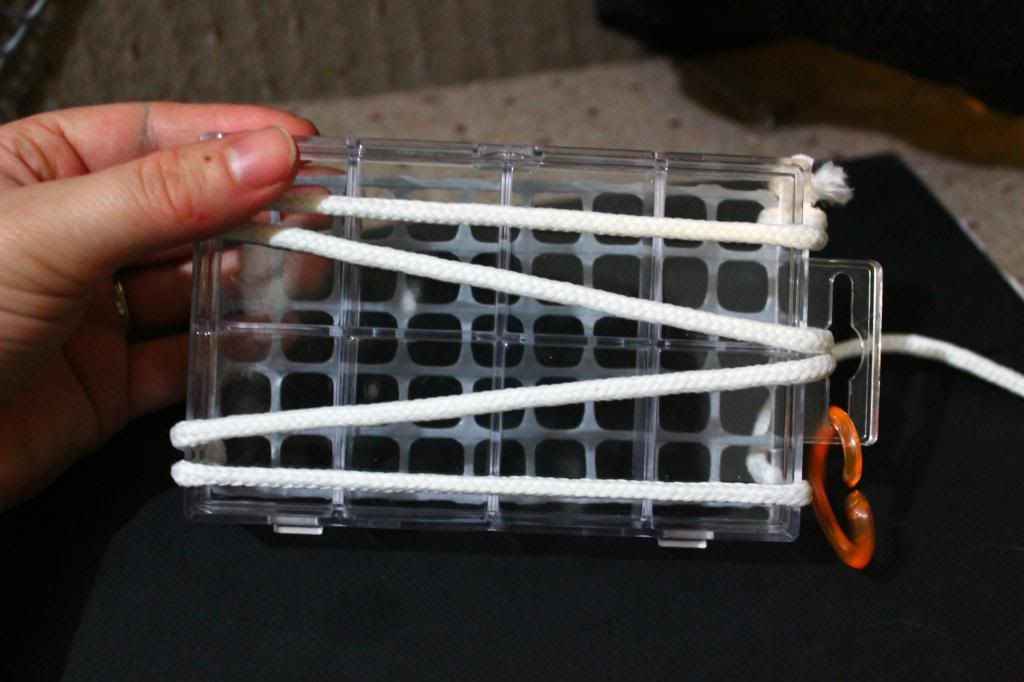
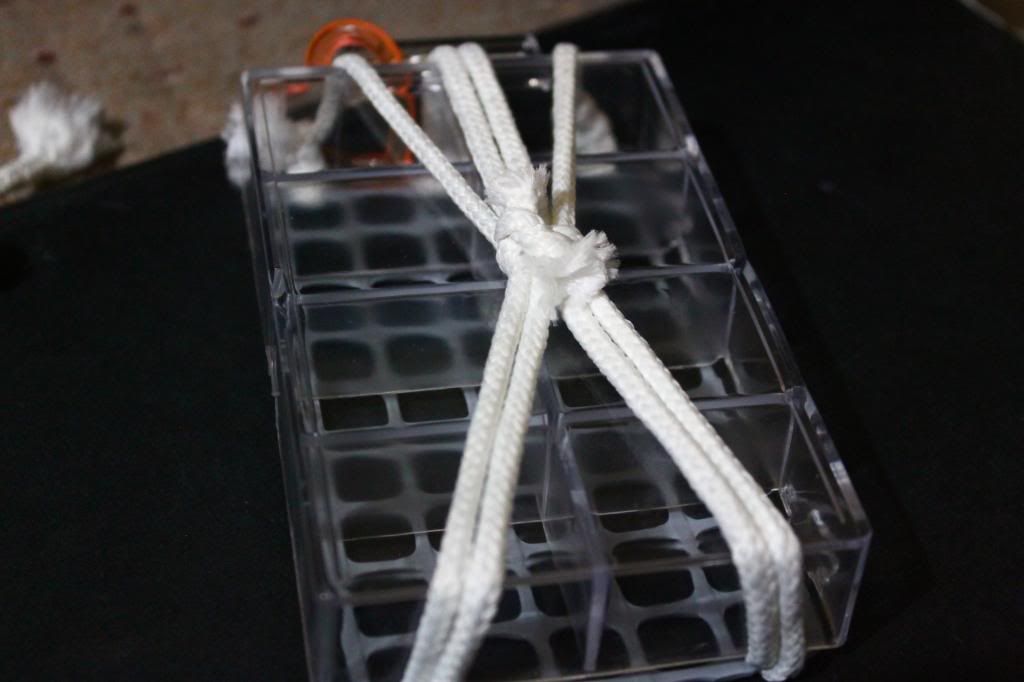
You should now have a pattern on the back that resembles this:
Step seven:
To prevent the rope from slide off the sides of the toy, you should take an extra bit of rope and tie all the ropes in the middle on the back.

Step eight:
The almost finished product! All that's needed to do is to secure the clip (if you hadn't done so). You might need to tie the clip on or you may get lucky and have a part already on the container to attach the clip to. After this step, all you have to do is fill the toy with shredded papers, bits of cardboard, yummy treats, and all other things that you can think of!
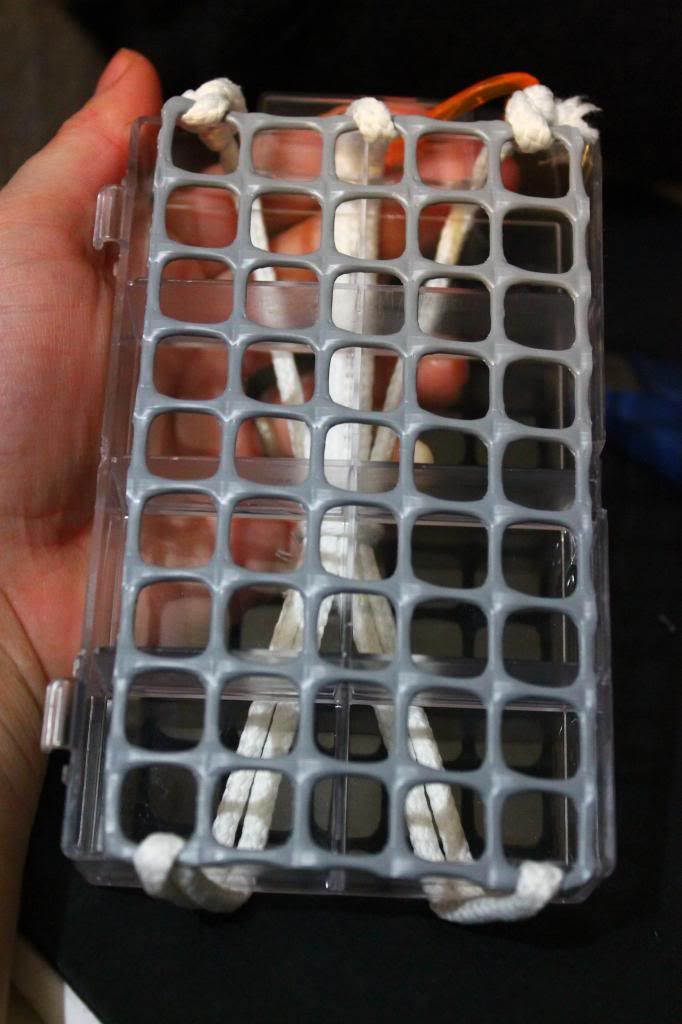
This toy is suitable for most smaller birds. I'd recommend for birds such as Senegals, conures, and smaller.
What you will need:
1 Bead container, see photos.
1/2" spaced plastic mesh
Birdsafe rope/twine OR zipties (make sure you file down any cut edges!)
1 Bird safe clip
Scissors
Dry treats your bird(s) likes (millet and nuts are ideal)
Paper, cardboard, and other "fillers"
Step one:
Take your bead container and empty out the beads (if they are size/material appropriate for your birds, keep them for other bird toys!).


Step two:
Remove the hinged lid from the container. Discard the lid!

Step three:
Get your supplies ready.
This is the roll of the mesh in our closet for storage, you can see how much we have of it. It's very handy for a LOT of bird-related DIY projects, so buying a whole roll isn't so bad--there's always a use!

Step four:
Cut a section of the mesh to size for the bead container. Make sure you do not have any sharp corners or sharp edges. You should cut close enough to make a clean rectangle with smooth edges.

Step five:
Take your rope and tie it to one of the corners of the mesh. Make sure it is secure.

Step six:
Allign the mesh onto the front of the container and take the tied rope and secure it to the other side of the toy. Keep the front of the toy free of the rope and secure the rope tightly. You should make sure you secure the corners of the mesh to the toy as tightly as you can. Upon the last corner, tie off the rope and cut off the excess.


You should now have a pattern on the back that resembles this:

Step seven:
To prevent the rope from slide off the sides of the toy, you should take an extra bit of rope and tie all the ropes in the middle on the back.


Step eight:
The almost finished product! All that's needed to do is to secure the clip (if you hadn't done so). You might need to tie the clip on or you may get lucky and have a part already on the container to attach the clip to. After this step, all you have to do is fill the toy with shredded papers, bits of cardboard, yummy treats, and all other things that you can think of!

This toy is suitable for most smaller birds. I'd recommend for birds such as Senegals, conures, and smaller.


